
STORY AND PHOTOS: CASEY CORDEIRO
Story from the 2019 Gear Guide
Sure, there are plenty of first-aid kits, plenty of toolkits, and plenty of random supply cases on the market. All of these items require you to store them separately while you’re out on the trail. Wouldn’t it be nice if you could have one case that has an assortment of tools, first-aid items and essentials all within easy reach?
This question is one that we have been dying to answer for years, and we have seen so many different setups. Many of us want a simple, cost-effective solution. As any person with a design mind would say: We knew there had to be a better way!
After many ideas and oh-so-many trips of forgetting just one more thing, it’s difficult to remember everything, including important tools and supplies for the first-aid kit, not to mention tow straps, extra food, water, etc. We knew there had to be an all-in-one solution for hauling tools and first-aid items. We use hard cases for all types of things, like our camera gear and work items, but these hard cases are useful for many more things. This is especially true when we look at how easy it is to modify the foam these days—no more turkey cutter needed (if you don’t want to use it). We researched hard cases and found two sizes to put this kit together: one compact and one a bit bigger. We settled on the compact unit as our final “Ultimate UTV Trail Kit” case (orange in the pictures) because it still fit many of our most needed supplies yet didn’t have the bulk of the other case. Plus we found a cost-effective and easy-to-use solution to mount this case to any roll cage, should you want to go this route and have a permanent mounting solution. So, let’s get into the build.
STEP 1—FIND A CASE
For the hard case, we went with the tried-and-true option: Pelican. Yes, there are cheaper options on the market, but the build quality and variety of foam options are what sold us on Pelican cases. Plus, they are meant for military use, and they have more than 50 sizes available. How could you not find the right one?
We settled on the 1450 case—in orange, of course. Measuring out to be just over 16 inches in length and 13 inches wide, plus more than 6 inches of usable space on the inside, this case was going to be compact enough to fit on a UTV, yet large enough to handle all of our tools.
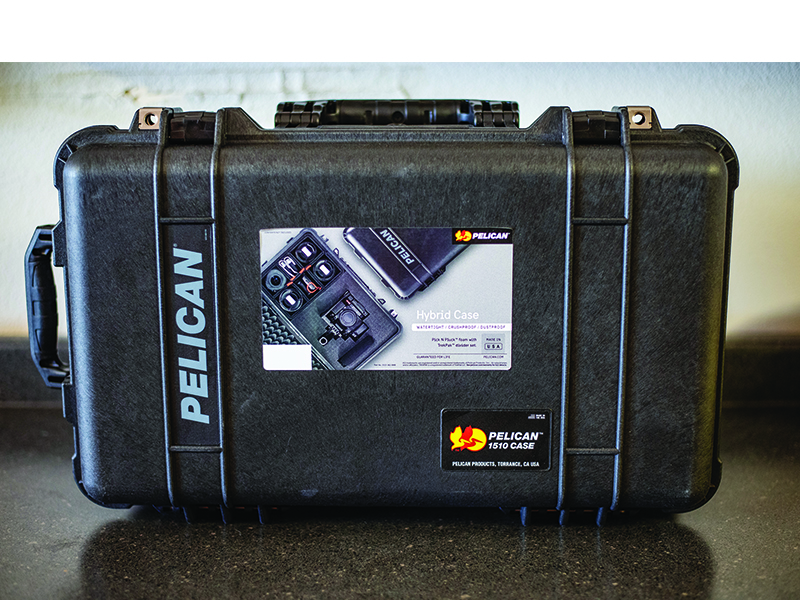
If you want a bit of a larger option, the 1510 Hybrid case is the other one that we chose to use for this project. The Hybrid is new in the way that it has the Pick N Pluck foam like the 1450, but it also has Pelican’s TrekPak divider system. We started laying this out and like the ease of use, but the 1450 just fit our application a bit better when we mounted it on the roll bar.
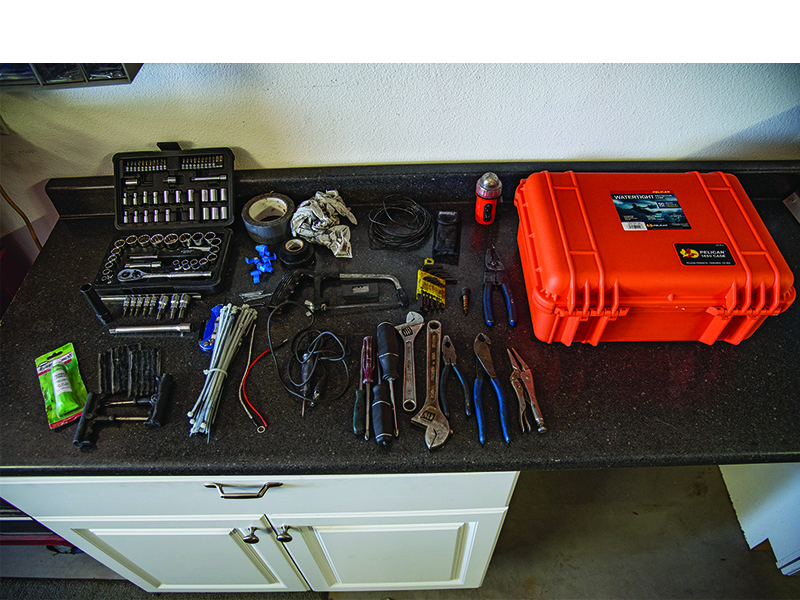
STEP 2—GATHER THE SUPPLIES
The reason this is called the “Ultimate” UTV trail kit is that it combines both tools and essential first-aid items. You can add and subtract whatever you would like from a kit like this, but we found these items to be some of the most important to include with a kit like this.
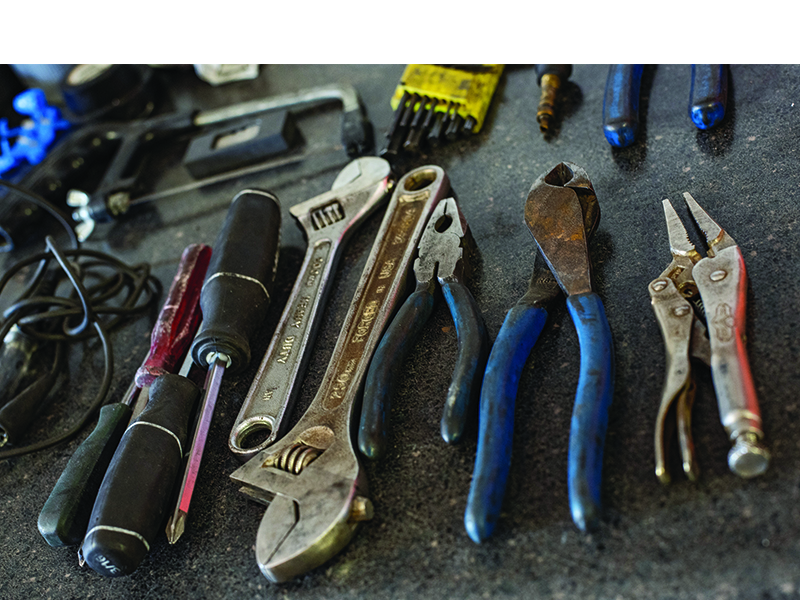
Start with the Essential Tools:
• Crescent wrench(es), vice grips, electrical tool, and snips
• Assorted sockets and wrenches
• Zip ties, bailing wire, duct tape, electrical tape, and cotter pins
• Spare fuses and electrical connectors
• Electrical-continuity test light
• Tire plugs (and the tools you need to put them in the tire: rubber cement, cleaning tool, and installation tool)
• Screwdrivers, hex set, and Torx set
• Hacksaw
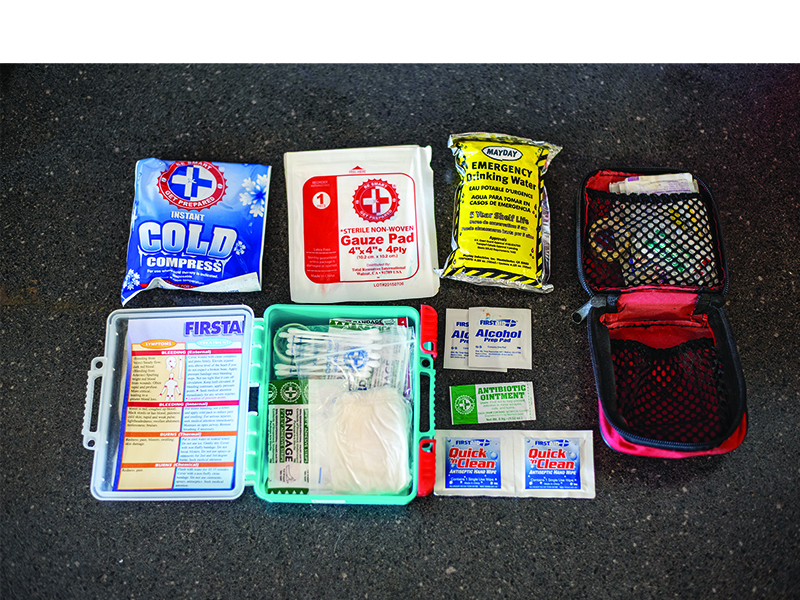
Assemble the essential first-aid supplies:
• Gauze pads of assorted sizes
• Adhesive bandages of assorted sizes
• Compression band
• Medical tape
• Medical gloves (latex-free so anyone can use them)
• Packet of water
• Triangular bandages
• Safety pins
• Tweezers
STEP 3—PUTTING IT ALL TOGETHER
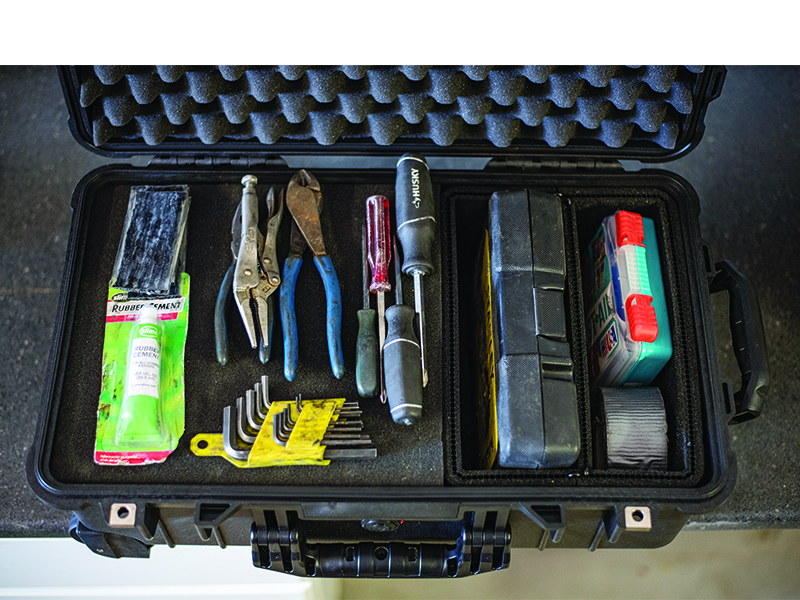
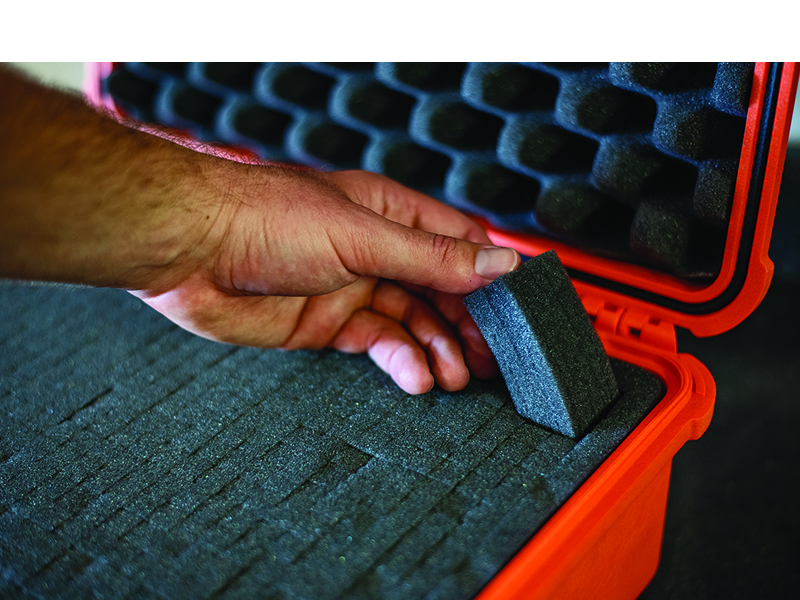
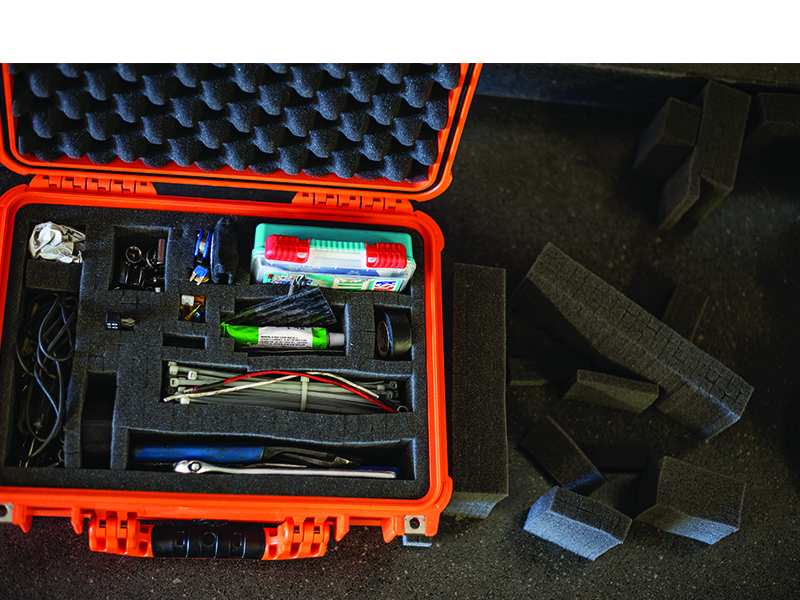
With the Pelican case, putting it all together is fairly easy. The simplest way to do this is to lay out all of your items on a workbench and group together similar tools. Once they are grouped together, start with putting one group at a time upon the foam. Once you have a general layout that fits, place the tools back on your bench, and start removing the foam. Begin with one section at a time, and pluck the foam out of its spot. It’s easy to do; just make sure you sever the foam all the way to the bottom on all four sides so you can take out that section. Place the tools in the spot you created. Then start the next section. Continue with all of your items while making sure you stick to your general layout.
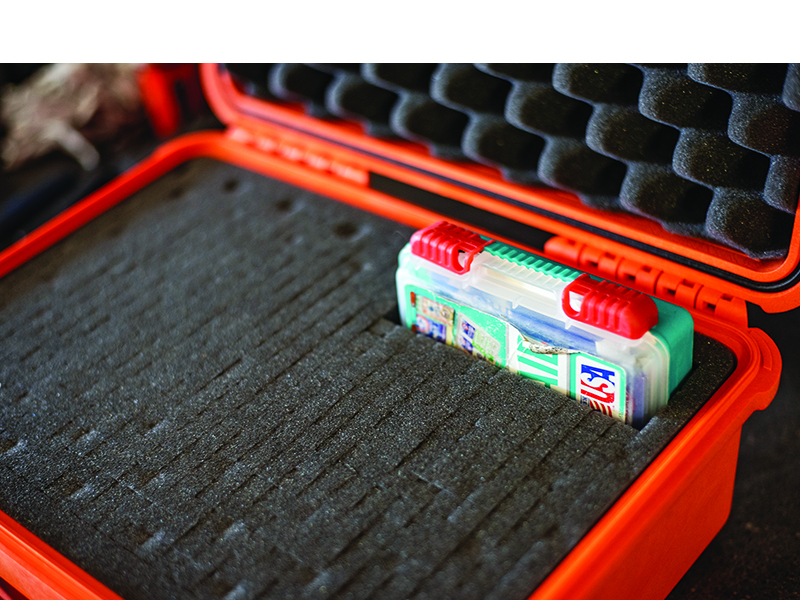
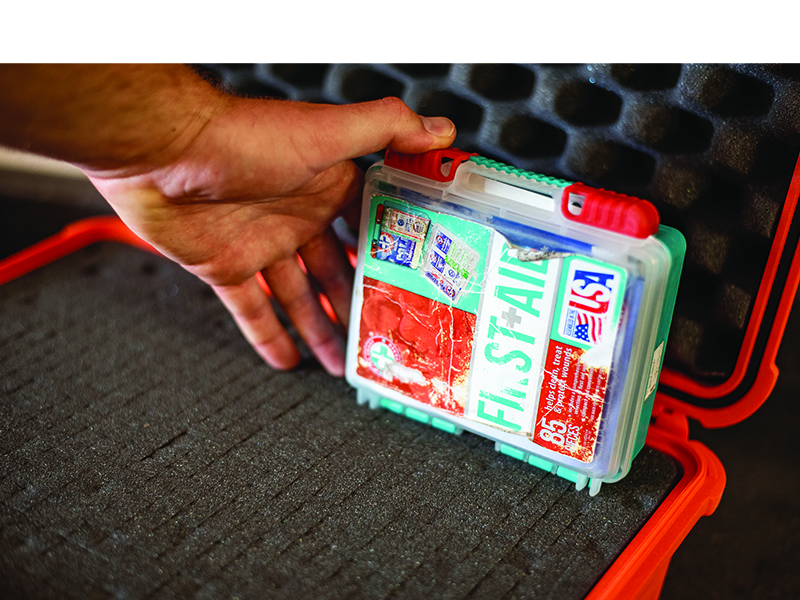
For the first-aid kit, it is easier if you have a small case to put these items in before cutting out the foam. This will ensure that your bandages and sterile items don’t get contaminated with tool gunk.
To keep items in their place, leave at least two rows of foam in between the sections that have a large amount of heavy tools. For example, between the wrenches and screwdrivers, we left two rows of foam so there was plenty of shock absorption between the two areas. Lighter items are just fine with one surrounding row of foam to keep everything in place.
Once you have it all together, the kit should look nice and organized.
STEP 4—WHERE ARE YOU GOING TO MOUNT IT OR STORE IT?
The easiest thing to do is to strap down a case like this in the bed of the vehicle. This can be easily done with the ridges in this case. You can even lock it in the vehicle with the metal locking areas on the front.
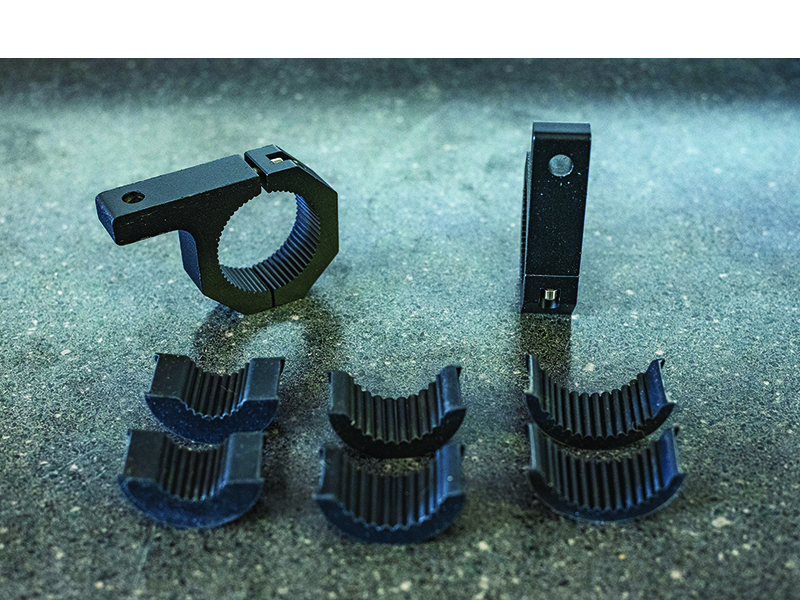
However, we did a little digging and found a simple and easy-to-install mounting bracket system on Amazon. Or your favorite UTV supplier probably has a similar item, but just be sure the brackets have a flat mounting surface. These particular mounting brackets require you to drill into the case, which will then void the fact that the case is waterproof. But if you’re looking to mount it securely on the roll cage for easy access, this is a simple and easy solution. We found these universal mounts for fairly cheap, and there are many different options for different tube sizes, etc.
Find a suitable place to mount the case. We’ve found that most UTVs have a crossbar behind the passenger seats that work great for this, allowing you to have easy, fast access. Keep in mind, you’ll want to mount this in a general flat orientation because these mounts don’t have quick-disconnect functionality, so you’ll be leaving the case mounted to the vehicle to access it. The foam will keep everything in place when you need to access it, so you’re good to go there.
Once you find the right spot for mounting, place the mounts in the area, and mock-up where you want to drill the holes into the Pelican case. Staggering the mounts in opposite directions (the case will have to be in the middle of the roll bar, one mount facing each way) will give you the most secure way to mount the case. Mark your holes, drill, and secure the mounts to the case, and you’ll be ready to secure the case to the vehicle.
STEP 5—FORGET YOUR LIST; JUST BRING THIS
The best part about actually building an Ultimate UTV Trail Kit like this is you always have the essential tools and first-aid items with you at all times.
Sure, you can add and subtract from the kit as you see fit and as your vehicles change, but this gives you a great base for putting together a fully functional tool assortment. Plus, we don’t like to admit it, but there is always a chance you’ll need a first-aid kit on the trail with basic supplies. This is an essential item, and this kit gives you just what you need to put this together.
CONCLUSION
Like we mentioned, put your own spin on this kit. When building yours, start with a durable case like the Pelican series. Then gather your tool and first-aid necessities, and take a bit of weekend time to assemble it together. Like us, you’ll appreciate the ease of use of this kit and convenience when you’re out on the trail. We take it everywhere, and we imagine you’ll do the same.
